The need for reliable and intelligent surveillance solutions is ever in need as everyone certainly desires to take care of their security. The UniFi G3 Dome, Ubiquiti G3 Dome is featured in this review.
If you are searching for a Dome-Shaped IP Camera to safeguard your home or protect your business, you will definitely find several options to choose from, but finding the right security camera is vital. As we review the UniFi G3 Dome/Ubiquiti G3 Dome, you will get to see its design, its features, how it performs, and the ways it empowers you to take control of your personal security. In the end, you will be able to decide if it is a camera that meets the needs of your use case.
Overview of the UniFi G3 Dome, Ubiquiti G3 Dome

The UniFi G3 Dome/Ubiquiti G3 Dome has a small form factor that makes it inconspicuous and very well-applicable in various environments like public spaces, in your home or business environment. It has an IPX4 weatherproofing rating, an operating temperature between -20 to 40° C (-4 to 104° F), it weighs 260g and its dimensions are Ø132 x 60 mm (Ø5.20 x 2.36″).
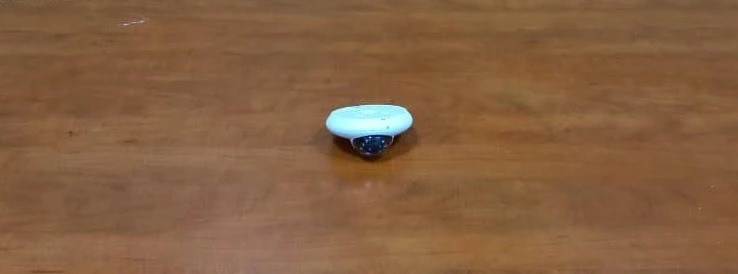
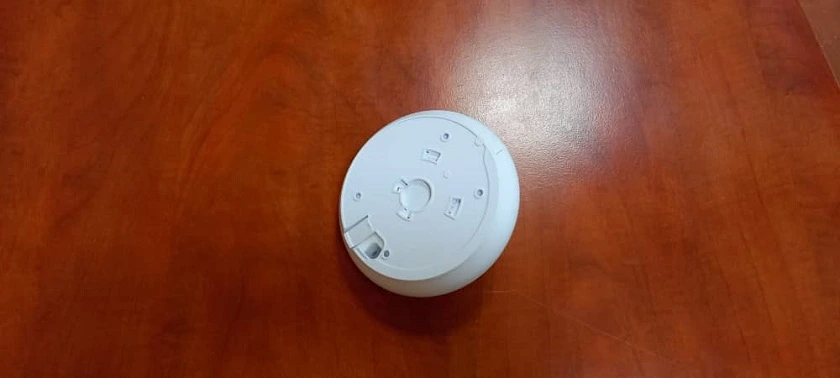
Taking a quick look at the camera, in front you will observe the camera’s lens and infrared LEDs. Then, under you have the camera’s Mounting Bracket that when you take out, you find other physical features of the camera. To take out the Mounting Bracket, simply lift up the Security Slot and turn the camera anticlockwise. At the very top, beside the Cable Feed Plug, you have the camera’s Microphone. At the bottom, you will find an Ethernet Port, an SD Card Slot, and a Reset Button. Then, on the left-hand side, close to the Ethernet Port, you will observe the camera’s Status LED.
When you receive the UniFi G3 Dome/Ubiquiti G3 Dome, you get the Mounting Bracket, Ceiling Bracket Plate, 4 Flat Head Screws, 4 Other Screws, 4 Keps Nuts, a PoE Adapter (24 Volts, 0.5 Amp), a Power Cord, Extra Lens Cover with O-Ring, and a Quick Start Guide. It is worth mentioning that you need Ethernet or Network Cables (At least two). We will explain how to connect them in the next section.
How to Mount and Set up the Camera
The UniFi G3 Dome/Ubiquiti G3 Dome can be mounted on a wall or on a ceiling. Firstly, let’s see how to mount the camera on a wall. Begin by taking out the Mounting Bracket and placing it in your desired location with the indicated arrow pointing upwards. Then, mark out the four holes on the Mounting Bracket, and mark out a spot where you would drill and pass one of your Ethernet Cables. Now, drill your four holes with a 6mm drill bit and also drill the hole for the Ethernet Cable.
Ethernet Cable(s) Connection
To use the UniFi G3 Dome/Ubiquiti G3 Dome camera, you have to Power it Up and provide it with Network Connectivity. You can do this with the included PoE Adapter or a UniFi/Ubiquiti Switch (See our review of the UniFi Ubiquiti 8 Ports Switch). To use the PoE Adapter, you need one Ethernet/Network Cable to be plugged into the Ethernet Port on the UniFi G3 Dome/Ubiquiti G3 Dome camera, and the other end of the cable plugged into the PoE Port on the PoE Adapter. Then, one end of another Ethernet/Network cable should be plugged into the LAN Port on the PoE Adapter, and the other end of the cable plugged into your ISP’s Router. Then plug the power cable of the PoE Adapter into it and to your power socket.
If you are going to be using a UniFi/Ubiquiti Switch, you do not need the PoE Adapter. You would now take the other end of the cable that’s plugged into the camera, and plug it to any Port on your Switch. Then, one end of another cable plugs into another Port on your Switch and the other end goes to your ISP’s Router.
With this understanding, connect your camera’s Ethernet/Network cable accordingly, insert the Cable Gland, and then insert the Screw Anchors into the holes you’ve drilled, place the Mounting Bracket, and screw it securely. Then, take the UniFi G3 Dome/Ubiquiti G3 Dome and align it with the Mounting Bracket, and turn it clockwise till it locks into position.
To mount the UniFi G3 Dome/Ubiquiti G3 Dome on your ceiling, the process is similar to doing it on a wall. Simply place the Mounting Bracket on your ceiling and position it to face where the camera is going to be looking towards. Then, mark the four holes and the hole for your Ethernet/Network cable. Drill the four screw holes with a 3 mm bit and create the hole for your Ethernet/Network cable. Now, insert the screw anchors, place the Ceiling Backing Plate and the Mounting Plate accordingly, screw and fit the camera into position.
You can adjust the angle of the camera when it is powered and you can see the live view. However, to do this, press the lens cover downwards and rotate it anticlockwise to disengage it. Then, move the lens cover away from the body of the camera to remove it. So, set the camera body towards your desired viewing position, and tilt the camera lens assembly to your desired viewing position. Lastly, put the lens cover back, press down, and rotate the cover clockwise to lock it into position.
The UniFi G3 Dome/Ubiquiti G3 Dome with the UniFi Video Software and App
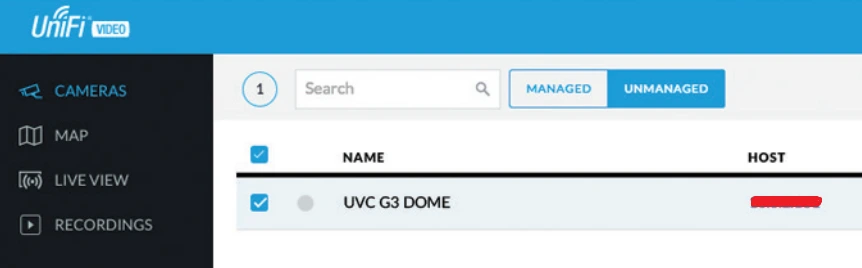
After the preceding steps above, the next step is to integrate the UniFi G3 Dome/Ubiquiti G3 Dome in the UniFi Video Software or Mobile App. So, simply download either of them and install them accordingly. You will observe that the camera is automatically detected. Now, click on the box next to UVC G3 DOME, and another box will appear to the right where you need to enter a Username and Password. The default Username for the UniFi G3 Dome/Ubiquiti G3 Dome is ubnt and the default password is ubnt. After entering these, click on Manage and you are done.
Performance of the UniFi G3 Dome/Ubiquiti G3 Dome camera
(1) Images and Video Quality
With any surveillance camera, clarity is one of the most important features it should deliver. The UniFi G3 Dome/Ubiquiti G3 Dome is a 1080p camera. With this, every frame it captures gives you enough detail. You will be able to easily identify faces or license plates, and conveniently monitor the area. The camera provides three resolutions which are High (1920 x 1080), Medium (1024 x 576), and Low (640 x 360) with FPS and Bitrates for each of these resolutions. In addition, the camera features Real Time Streaming Protocol (RTSP) and you can enable it for either of the three resolutions.
(2) Field of View
The UniFi G3 Dome/Ubiquiti G3 Dome has a sufficiently wide angle of view that minimizes blind spots. If you intend to monitor a large area like a parking lot, a hallway, or a backyard, the camera is able to cover it all with ease.
(3) Night Vision Performance
The UniFi G3 Dome/Ubiquiti G3 Dome performs night vision with its infrared LEDs and has no spotlights. When the area where the camera is located is well-lit, the image and video quality are appreciable. But in low-light or pitch-black situations, anything beyond 10 meters is poor.
(4) Recording and Motion Detection
The UniFi G3 Dome/Ubiquiti G3 Dome Records on Schedule, Records Only Motion, and performs Always Record. You can choose any of them to suit your recording or space requirements and the traffic around the camera’s view. Then, you have Motion Zones, you can draw specific areas and set the sensitivity of the camera to detect and record accordingly. Under Motion Detection, you can set the ”time” for Minimum Motion Event Trigger, Seconds To Record Before, and Seconds To Record After.
(5) Audio
The UniFi G3 Dome/Ubiquiti G3 Dome features an inbuilt microphone but you do not have two-way audio. The reception and sound quality are excellent.
| Pros | Cons |
| (1) Remarkable Images and Video Quality (2) Sufficient Wide Viewing Angle (3) Easy installation and seamless integration with the UniFi Video Software (4) Reliable Performance (5) User-friendly app for remote monitoring | (1) The camera has limited advanced features in comparison to premium IP cameras |
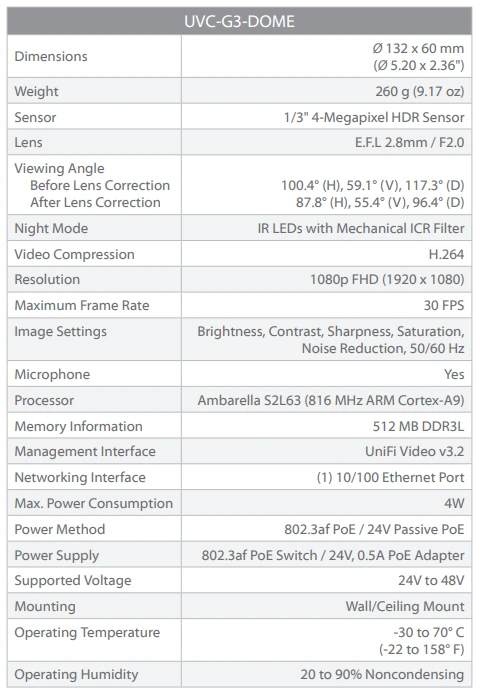
Full Specifications of the UniFi G3 Dome, Ubiquiti G3 Dome
The entire specifications of the camera are shown below.
Final Thoughts
The UniFi G3 Dome/Ubiquiti G3 Dome camera can provide you with reliable monitoring but doesn’t have modern smart capabilities. It delivers high-quality images and videos, customizable motion detection, secure video storage options, audio in your recordings, stable performance, and a nice mobile app. If you are an existing user of UniFi/Ubiquiti devices, you will enjoy having the camera in your ecosystem of devices. Overall, the security of your home or business environment is key, and if the features of this camera suit your needs, you can go for it.


![Ubiquiti Networks [5-Pack] UniFi Video Camera G3 (UVC-G3-AF-5)](https://m.media-amazon.com/images/I/31uL92XroPL._SL160_.jpg)

You may want to see our review of the Reolink RLC-842A and Reolink RLC-833A.
UniFi, Ubiquiti U6 Long Range Wi-Fi 6 Access Point, Cisco 9120AXI-E Wi-Fi 6 Access Point.