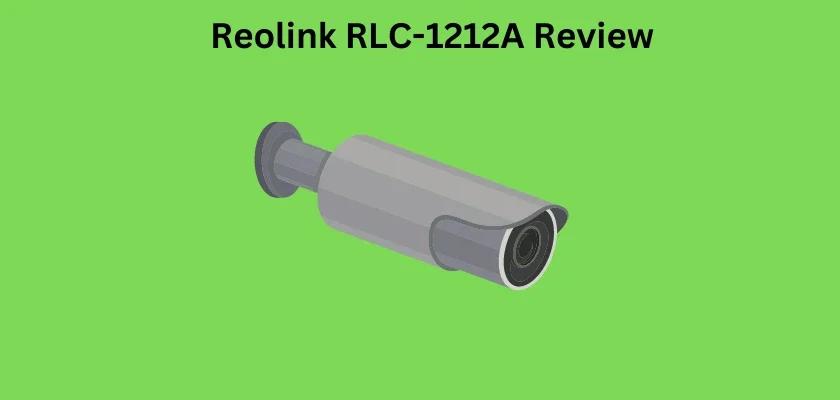

This review speaks about the Reolink RLC-1212A 12MP camera so as to provide a well-documented guide.
The widespread adoption of surveillance cameras for home or office monitoring has created an increasing demand for highly functional, and clearer surveillance IP cameras. The Reolink RLC-1212A 12MP camera shows up in this regard. If you desire a surveillance IP camera that ticks the box for image clarity, device efficiency, and reliability, you are certainly in the right place.
The Reolink RLC-1212A 12MP camera is a sought-after device, particularly because it is a 12MP camera. At the end of this article, you will be well-informed as to what this device is capable of and if it suits you.
Let’s get started.
Reolink RLC-1212A 12MP Camera Overview
The Reolink RLC-1212A 12MP camera is a product by Reolink, a well-known brand in surveillance and security systems. This camera is a compact, AI-Powered surveillance camera. Taking a quick look at the front, you will observe the camera’s spotlight at the very top. Below this is the camera’s ultra-high definition 12MP lens with its infrared LEDs at both the right-hand side, and left-hand side of the lens. Lastly, at the front, you have the camera’s daylight sensor below.
Looking at the back of the camera, you will observe an enclosure with two screws. This enclosure houses the SD card slot. Below this, you have the camera’s ball joint mount which is capable of 90° rotation. Under the Reolink RLC-1212A 12MP camera, you have a loudspeaker and microphone.
Attached to the camera is a cable with three connectors; one for power, another having a reset button, and the third having a LAN port for Ethernet cable connection. It is worth mentioning that the Reolink RLC-1212A 12MP camera is a PoE camera. For those who are not familiar with this terminology, it simply means Power over Ethernet and enables this device to be powered ON, and receive network connectivity with just an Ethernet cable. This is possible if you have a PoE Enabled Router, Switch, NVR, or PoE Injector. If what you own is not PoE Enabled, you can simply power up the camera with a 12 Volts 1 Amp power supply adapter (<12 Watts).
Again, this means that the Reolink RLC-1212A 12MP camera is not a Wi-Fi-supported camera, or it cannot directly be connected to a Wi-Fi network. We will show how to set up the camera with regards to power and network connectivity in the next section.
The Reolink RLC-1212A 12MP camera has an aluminum metal construction, measures 187mm x 67mm (LxH), and weighs 460 grams. When you receive the package, you will find the Reolink RLC-1212A 12MP camera, a mounting template, mounting screws and anchors, a waterproof lid, an Ethernet cable, a window decal, and a waterproof lid installation guide.
Let’s see how to set up the camera.
Mounting and Setting Up the Reolink RLC-1212A 12MP Camera
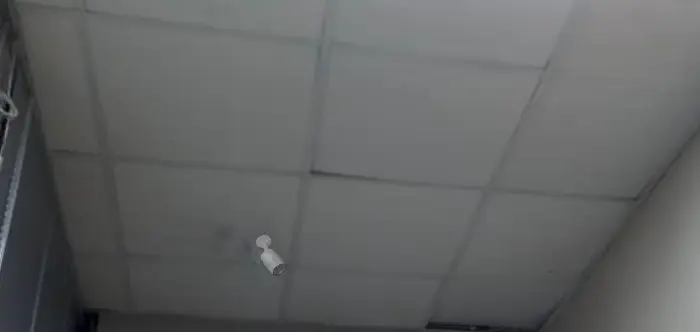
Firstly, the Reolink RLC-1212A 12MP camera is obviously not a wire-free camera. So, find a suitable location where you can conveniently mount the camera, and connect an Ethernet cable to it and to your router, switch, NVR, or PoE Injector. If you will be using a 12 Volts D.C adapter, consider this as well.
Before mounting the camera, insert an SD card (up to 256GB) into it for local storage. To mount the camera, simply place the mounting template on your desired location and mark three points for three holes. Then drill the holes accordingly, insert the anchors included in the box, and screw the camera into position.
Now, to set up the Reolink RLC-1212A 12MP camera with regards to power and network connectivity, you can do this in different ways:
(1) Using a PoE Switch, Router, NVR, or PoE Injector
With this method, if you have a PoE Enabled switch, router, or NVR, with internet connectivity, simply plug one end of an Ethernet cable into any of these devices and the other end of the cable to the Reolink RLC-1212A 12MP camera and it will come ON. This provides power and network connectivity to the camera.
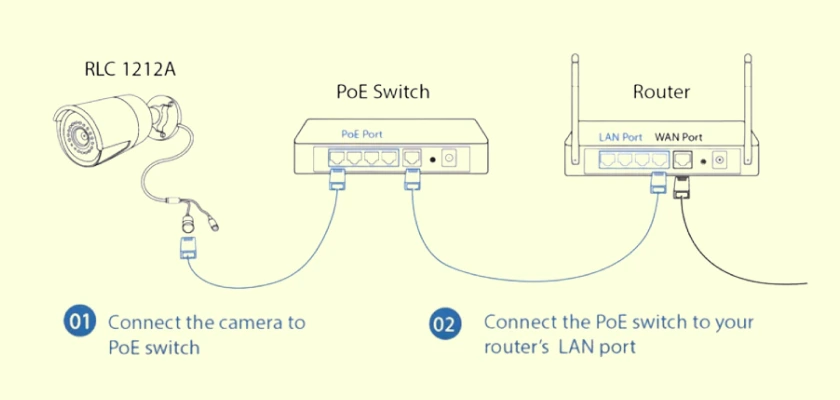
There is also the common scenario where your internet connection comes from a Wi-Fi router or modem that’s not PoE Enabled, with this you have to use two Ethernet cables and a PoE Enabled switch or PoE Injector. One end of one Ethernet cable plugs into the Wi-Fi router or modem, and the other end of the cable plugs into the PoE Enabled switch. Then, one end of the second Ethernet cable plugs into the PoE Enabled switch, and the other end plugs into the Reolink RLC-1212A 12MP camera. This method is shown in the picture below.
The third Ethernet cable you see in the picture below is the one providing the internet connection from the ISP.
Furthermore, if using a PoE injector (IEEE 802.3af), you do not need a PoE Enabled switch. You need the Ethernet cable coming from your Internet Service Provider to be plugged into the LAN Port on the PoE Injector. Then, one end of another Ethernet cable is to be plugged into the PoE Port on the PoE Injector, and the other end to the camera.
(2) Using a 12 Volts 1 Amp D.C Adapter (<12 Watts)
With this method, you can power ON the Reolink RLC-1212A 12MP camera with a 12 Volts 1 Amp D.C adapter, with a power rating less than 12 Watts.
If you do this, you then simply connect one Ethernet cable to your Wi-Fi router or modem, and to the camera.
After setting up the camera with whichever connection type suits you, remember to use the waterproof lid accordingly. The next step is to set the camera up on the Reolink app.
Setting Up the Reolink RLC-1212A 12MP on the Reolink Application
Setting the camera up on the app is a pretty straightforward process. If you are a new Reolink user, simply download the app. It is available on Android, iOS, and PC software.
Once you have the app, simply click on Add in the upper right-hand corner of the homepage. You will be required to scan the QR code at the bottom of the camera. After doing this, the Reolink RLC-1212A 12MP will show in the app. Then, click on it and create a Device Password for it, click Next and give the camera a unique name. After this, you should see a thumbnail of the camera on your screen. Simply tap on it and the live view from the camera will show up.
Camera Features and Performance
The Reolink RLC-1212A camera is designed with a 12MP resolution at 20 frames per second (4512 x 2512 default). This means the camera is able to provide excellent images and video that embody natural colors, with a balanced output. Amazing!
The camera has a wide Field of View at 118° Horizontal and 66° Vertical. With this, you have a wide coverage area wherever the camera is placed. It also has infrared LEDs for night vision up to 30 meters, as well as spotlights that provide colored night vision at 6500K/700 Lumens. In addition to this, the camera is capable of Automatic-Switching with Infrared-Cut Filter.
The Reolink RLC-1212A 12MP camera is an outdoor IP camera with an IP66 rating. With this, it is able to withstand any harsh weather conditions, and function optimally. It features local recording onto an SD card (not included/Class 10, FAT32 recommended), and recording onto Reolink NVRs. When recording onto an SD card, note that it can quickly become full because of the camera’s high-resolution video clips. The camera also will begin to overwrite from the earliest video clips if it is configured to do so.
As mentioned, the Reolink RLC-1212A 12MP supports Reolink NVRs and if you want to keep your video footage for longer, you can opt for an NVR. The supported NVR hardware versions are; N5MB01, N6MB01, and N7MB01. You can configure the camera to record 24/7, by schedule, by all motion, or by persons and vehicles.
Moving on to motion detection, the Reolink RLC-1212A 12MP features smart motion detection for persons and vehicles. This assures you receive only accurate alerts. You also have detection zones with this camera, and you can set detection zones accordingly.
Along with these, you can adjust the motion sensitivity of these detections. If you want the spotlight to turn ON at night as a result of motion detection, you can set the camera to do this as well. There are also other customizable motion detection features with the Reolink RLC-1212A 12MP like Alarm Delay, Object Size, and Voice Alarm.
With regards to notifications, you can configure the camera to send you notifications for all detection types or just a specific type of motion detection.
As we’ve seen so far, the Reolink RLC-1212A 12MP is capable of two-way audio. This enables you speak to acquaintances, visitors, or your pets, and the camera’s siren is loud enough to deter an unwanted visitor.
Other features you get with the Reolink RLC-1212A 12MP are Synology, Time-Lapse, and Smart Control. However, smart control is limited to Google Assistant. Amazon Alexa will be supported but as of the time of writing, it is unavailable. There are other features configurable on the Reolink Application to help you get the most out of the Reolink RLC-1212A 12MP camera.
It is also worth mentioning that the Reolink Mobile Application has one of the fastest response times you can get. When you click on a thumbnail, the app is able to display a live view almost immediately. Also, it has a nice user interface and a satisfactory user experience with the Reolink RLC-1212A 12MP camera.
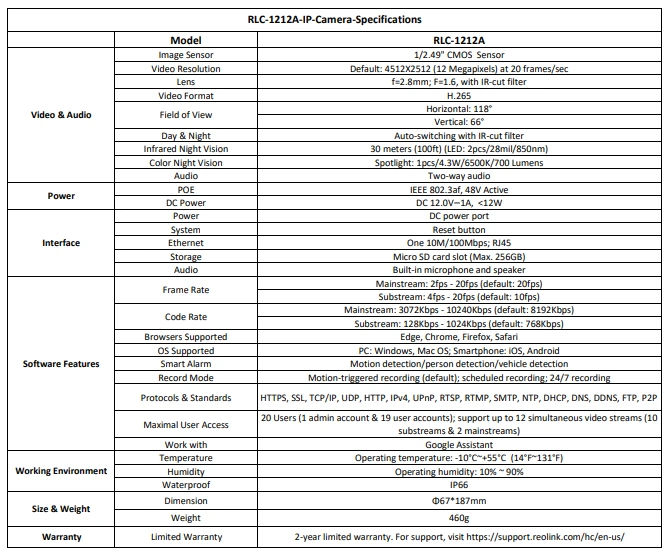
Full Specifications of the Reolink RLC-1212A 12MP Camera
The entire specifications of the Reolink RLC-1212A 12MP camera are shown below.
Final Thoughts
The Reolink RLC-1212A 12MP is a sought-after IP camera due to its ultra-high definition image and video quality, and it is a PoE camera. Being a PoE camera may be a deal breaker for some people due to cabling, while it may not be for some others who like the idea that LAN connectivity is stronger or more reliable than Wi-Fi connectivity. Overall, the camera’s performance is as expected and so far, no reason to fault it in any way.
Get the Reolink RLC-1212A 12MP on the Reolink Official Website
You may want to see the 12MP Turret-Shaped Reolink RLC-1224A.


