Stellar Data Recovery Professional is a popular software today that is designed to take care of data loss and this review seeks to explore it.
In today’s digital world, the value of our data is unfathomable. Data such as your official documents, cherished family photos, and what have you, are things you want secure. But when we least expect it, data loss can happen. When this happens, despair, anxiety, and the desperation for an immediate solution is imminent. This is where applications like Stellar Data Recovery Professional come to play.
Stellar Data Recovery Professional is a software that’s designed to help individuals and businesses recover mistakenly deleted data, or just lost data by any means. It may be a beacon of hope for those in need of this kind of solution. Let’s go through this Stellar Data Recovery Professional to see its features and capabilities, and the transformative potential it holds to cater to the seemingly impossible task of data recovery.
Overview of Stellar Data Recovery Professional
Stellar Data Recovery Professional is a robust software packed full of features. For Individuals, it has DIY tools for Windows Data Recovery, Mac Data Recovery, iPhone/iPad Data Recovery, and Android Data Recovery. These give you the opportunity for photo recovery, photo repair in case of corrupt files, video and audio file repair, and file erasure. You can perform these operations on your Hard Disc Drives, SSDs, SD Cards, USB Drives, and other storage media, while using your Windows OS, macOS, and Android OS.
For Businesses, Stellar Data Recovery Professional has advanced repair and conversion tools. You have Email Repair (Exchange Repair, Outlook PST Repair, Exchange Auditor & Reporter, and Active Directory Repair). Then you have Email Converter (EDB to PST, OST to PST, NSF to PST Converter, MBox to PST, OLM to PST, and Windows Mail to PST). Next, you have File Repair (SQL Repair, Access Repair, Quickbooks Repair, MySQL Repair, PDF Repair, and Excel Repair). Moving further, you have Data Recovery (RAID Data Recovery, Tape Data Recovery, and Virtual Machine Recovery). Then, you have Data Erasure (File Erasure, Mobile Erasure, and Drive Erasure). Furthermore, you have a Toolkit (Exchange Toolkit, Outlook Toolkit, File Repair Toolkit, MS SQL Toolkit, Data Recovery Toolkit, and Enterprise Toolkit). Lastly, you have Forensic (Email Forensic, MySQL Log Analyzer, and MS SQL Log Analyzer).
It is worth mentioning that Stellar as a brand has its Lab Services. This is a specialized data recovery service that enables individuals and businesses who face complex, critical data loss problems, and have exhausted the DIY recovery options to get expert solutions. With this, you can get emergency service, customized solutions, evaluation and diagnostics, advanced data recovery/verification, and data transfer & return.
How to use Stellar Data Recovery Professional
With an understanding of the Overview we’ve just talked about, you then need to proceed with the Individual or Business option. With either option, using Stellar Data Recovery Professional is a very easy and straightforward process. It simply entails Downloading the Software, installing it, and following the on-screen instructions to complete the installation.
Stellar Data Recovery for Windows
To get started with Stellar for Windows, ensure your PC meets the requirements for the installation and running of the software. These are shown below.
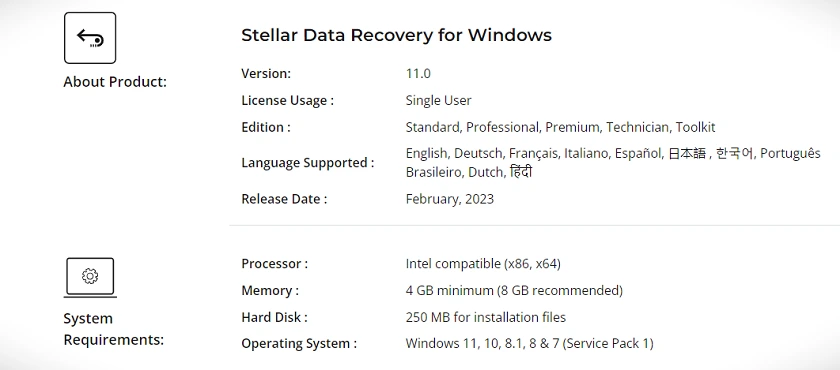
Then, go ahead to Download Stellar Data Recovery for Windows. The software was 90.2MB at the time of our download, and upon clicking install, it installed locally, without needing a remote Server to complete the installation.
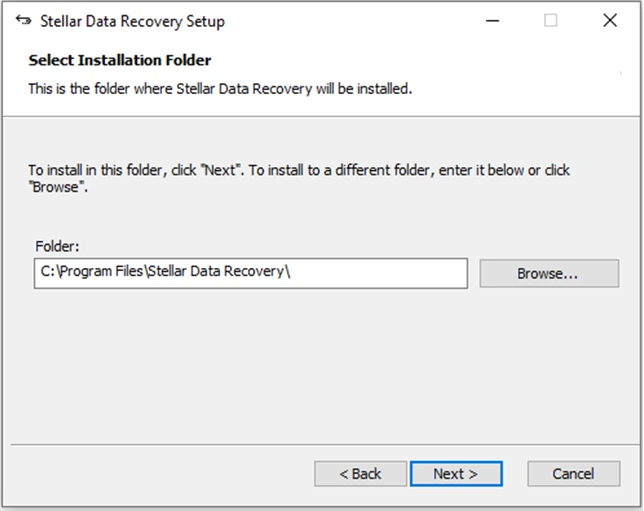
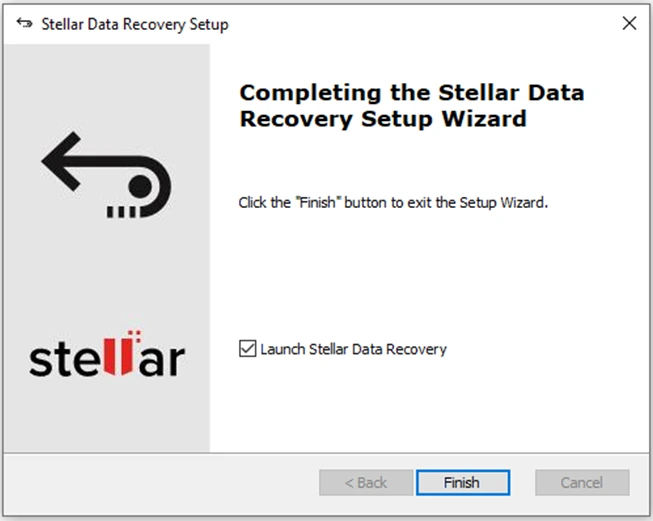
After the installation and launch of Stellar Data Recovery Professional, you will be presented with the screen that’s shown below. However, if you haven’t entered your activation key, you will see ”Stellar Data Recovery Demo” at the top. To enter your activation key, simply click on the ”key icon” on the top left-hand side of the interface and a box pops out for you to enter it.
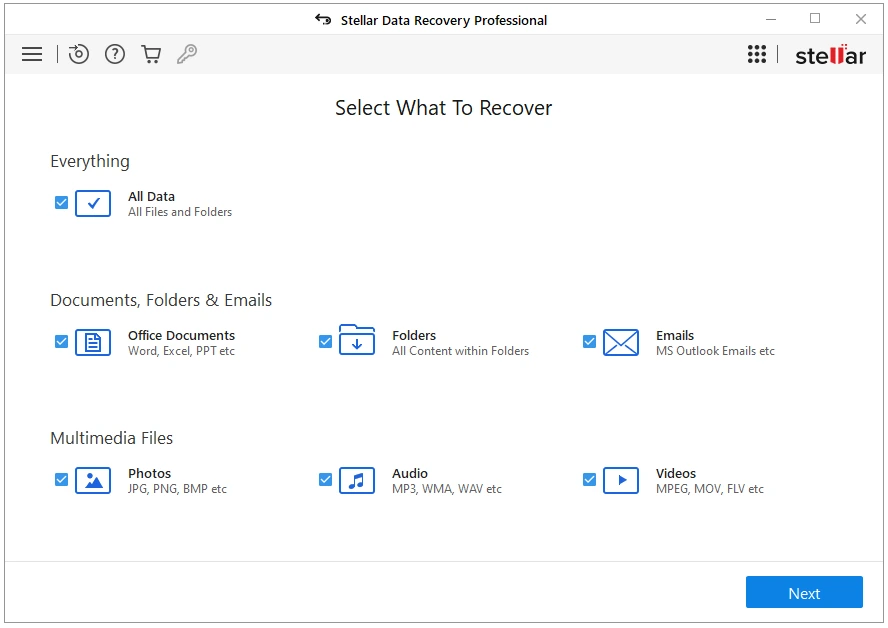
Looking at the top left corner of the interface, you have five icons. Clicking on the first icon will show you Settings, Create Disc Image, Recover from Disc Image, Save Scan, Resume Journey, Submit Support Ticket, and About. The second icon is a Create Recovery Drive feature, the third is a Help feature, the next icon is to buy the software online, and the fourth is to enter your activation key. Now, let’s see what there is under Settings in the very first icon:
(1) Preview
It is recommended that you turn this feature OFF during your scans as it significantly speeds up scan time. By default, it is turned OFF. Then, you have ”Preview Corrupt Photos in Safe Mode” and this is ON by default.
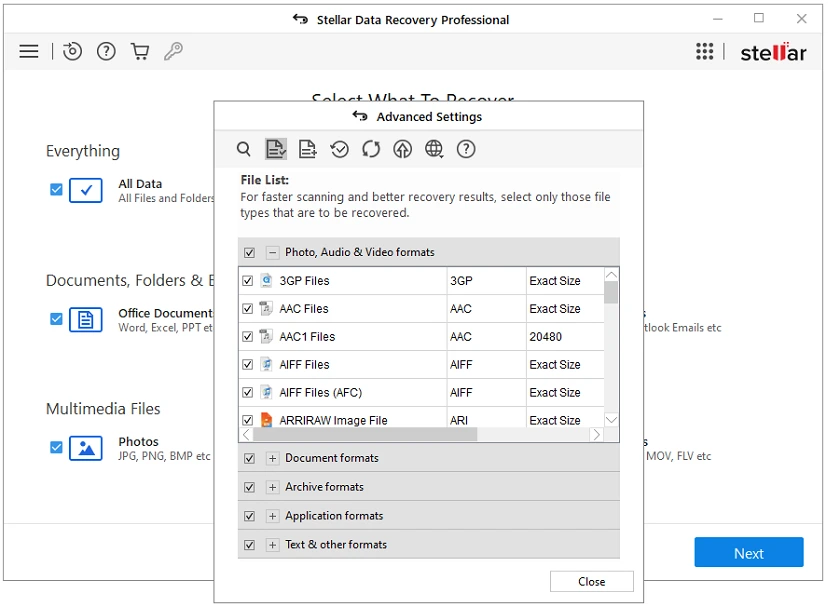
(2) File List
This is the next Tab under Settings. It allows you to select only file types that you want to recover because, for faster scanning and better recovery of results, you should select only the most important file types. You have several file formats to choose from which are Photo, Audio & Video formats, Document formats, Archive formats, Application formats, Text & Other formats as shown below.
(3) Add or Edit File Type
This feature gives you the option of adding files and editing files. You simply add a new file by entering 10 or more sample files using the ”Add Button” and the software will identify the file signature for you. Then, you also have the Edit File Type where you can use the ”Edit Size Button” to edit the average size of a file type that is listed, and you can delete user-defined files with the Remove Button.
(4) Resume Recovery
This feature allows Stellar Data Recovery Professional to resume from an incomplete scan so long as the scanning data is saved. To resume, simply click on the ”Resume Recovery Button”.
(5) Updates
This Tab enables you to check for updates for your Stellar Data Recovery Software.
(6) Software Upgrade
This Tab gives you the option to unlock more features from your Stellar Data Recovery installation by entering an upgrade key to move the software to a higher package.
(7) Languages
Here, you can choose other languages you want. As of the time of writing, there are 10 languages in the Stellar Data Recovery Professional.
(8) Help
This is the last Tab under Settings and clicking on this takes you to a Help page with several topics to guide you in using the software.
Create Disc Image
Stellar Create Disc Image is a remarkable feature that can create an image of any Drive or Partition on your PC or external Drive that is connected to your PC. The Stellar Create Disc Image will create a replica of any Partition you wish to recover data from to speed up the recovery process. You also have the option to create an image of just a particular region and to do this, select it in the Advanced Settings icon.
Recover from Disc Image
Stellar Recovery from Image feature lists all Drive Images on your PC, and you can then select any one of them to begin recovering your data. Simply click on your desired Image File using the ”Image Name” section and click on ”Scan” to start the process. Lastly, Save Scan, Resume Journey, Submit Ticket, and About are the last things you will find under the very first icon.
Moving to the right-hand side of the Stellar Data Recovery Professional GUI, clicking on the icon just before ”Stellar”, you find Create Recovery Drive, Monitor Drive, and Compare Editions.
Create Recovery Drive is a feature that enables you to choose a USB Drive that would then be converted to a Bootable Flash Drive. Once this is done, this Drive can then be used to Boot up a Non-Booting or crashed Operating System.
Monitor Drive is an extremely robust Hard Drive Health Monitoring tool in the Stellar Data Recovery Professional software. It seamlessly performs checks on all Hard Drives in your PC and external Drives, for their overall performance, and when there are issues, you are instantly notified. The Monitor Drive GUI is shown below.
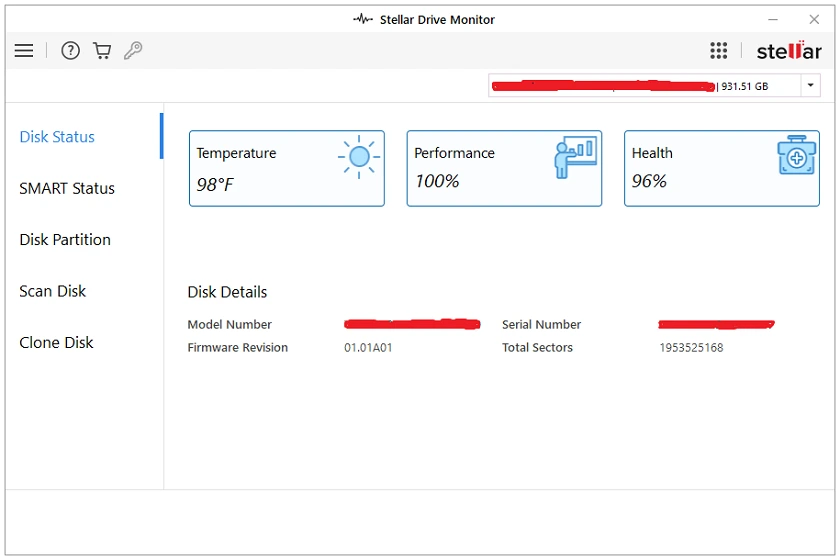
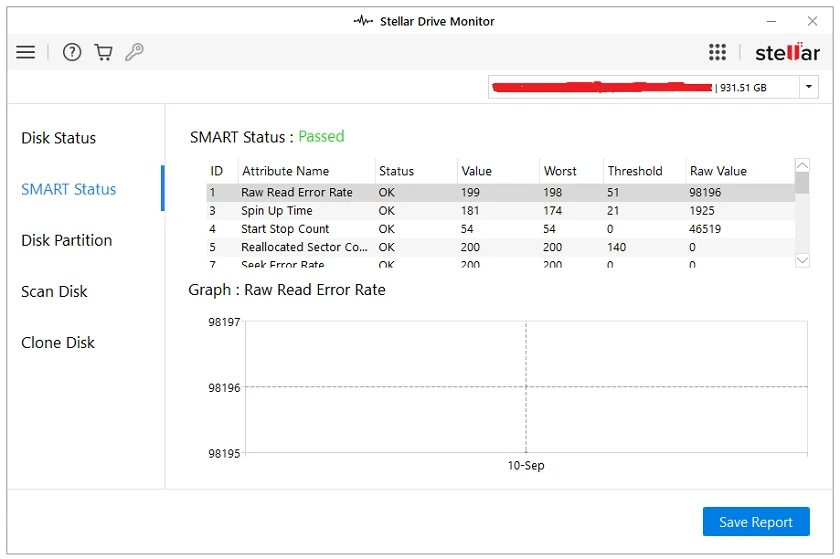
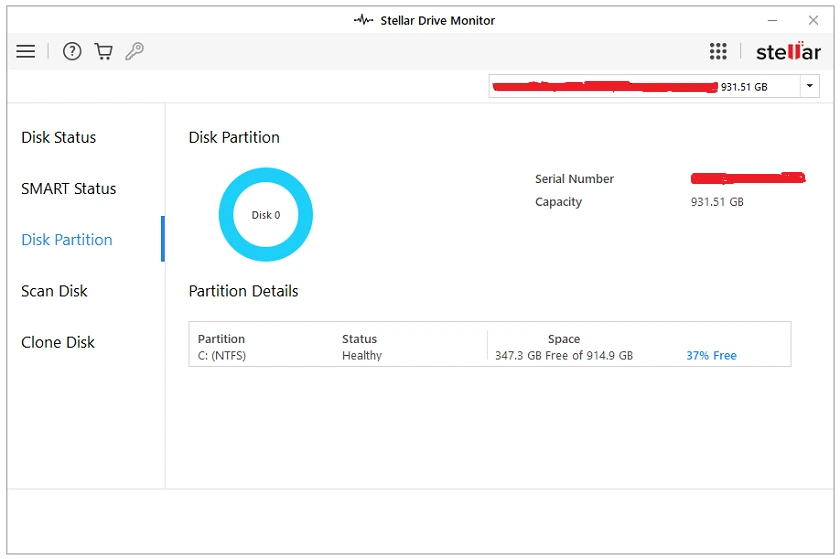
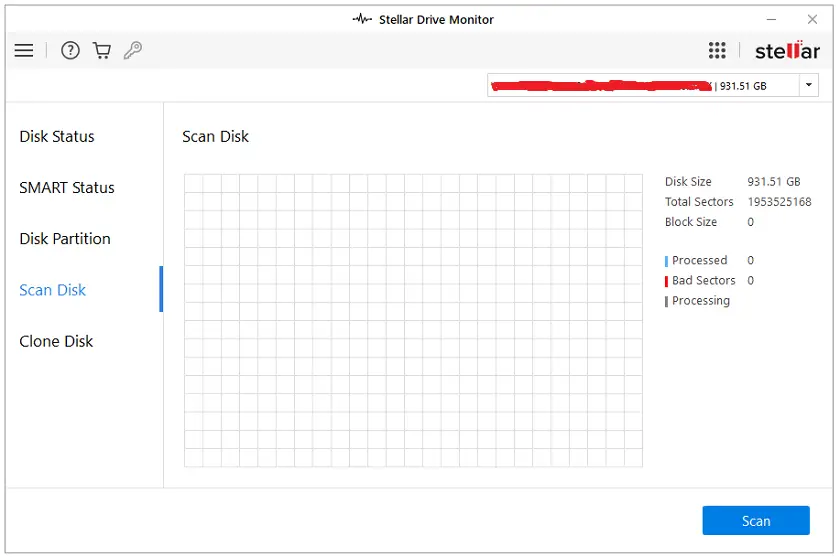
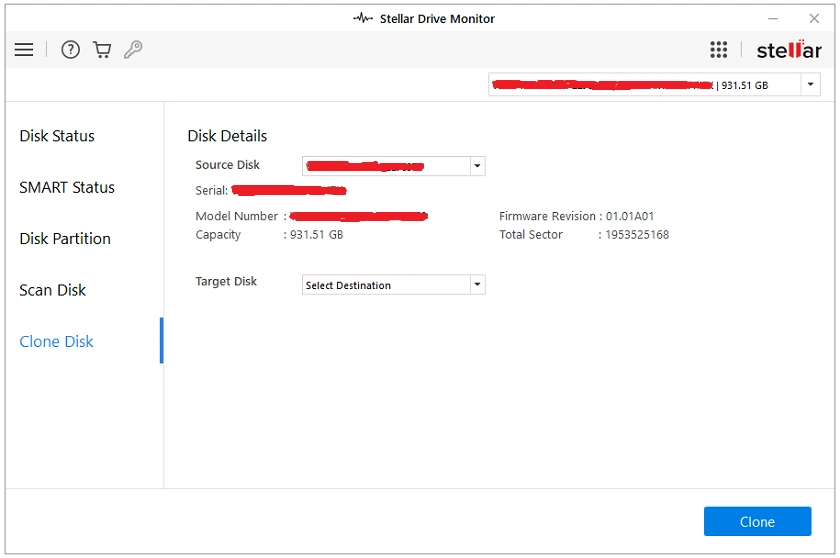
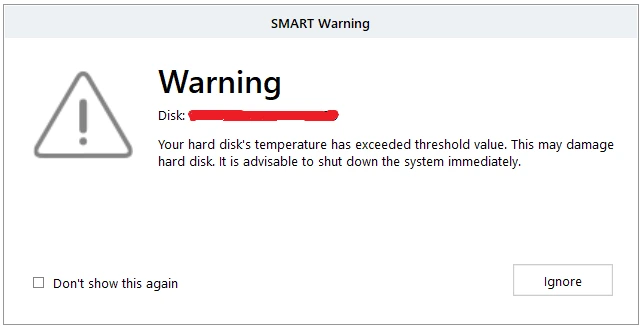
It is worth mentioning that when you click on the first icon on the top left-hand side of the Stellar Drive Monitor interface, you will find Settings there. Now, this will enable you to change the Temperature Unit from Fahrenheit to Centigrade and vice versa. Then also, you can ‘‘Enable Temperature Alarm”. This is enabled by default and you can then set the Warning Temperature and the Shutdown Temperature (By default, this is 40°C and 50°C respectively).
Moving to Compare Editions, this simply shows you three major Stellar Recovery Plans which are Professional, Premium, and Technician. In here, you will find sufficient information regarding Subscription Type, License Usage, and all features.
Performance of Stellar Data Recovery Professional
With so much to explore, and make use of, in Stellar Data Recovery Professional, we evaluated this software based on the following key factors:
(1) Data Recovery Success Rate
With multiple partitions and a USB Drive connected to our PC hosting the Stellar Data Recovery Professional software, we performed deletions, and different scans with a record of the files that were in the Drives before and after the scans. Conclusively, Stellar Data Recovery Professional performed satisfactorily with Deep Scans. So, this means that whenever you use it, ensure to select Deep Scan as you are sure to recover whatever it is you are searching for.
Now, Data Recovery Success Rate is the most important factor to consider in any data recovery software and Stellar Data Recovery Professional does excellently at this. In several data loss scenarios, it is able to retrieve inaccessible data.
(2) Supported File Types
Stellar Data Recovery Professional is one software that truly provides a lot in this regard. With this, it means that the more the file types it can handle, the more useful it is for you. The software has a vast number of file types for Photo, Audio and Video Formats, Document Formats, Archive Formats, Application Formats, Text, and Other Formats.
(3) Ease of Use
Easy usability is also very important, especially for people who are not tech-savvy. This software is very lightweight and has a simple Graphical User Interface as you’ve seen in the screenshots attached to this review. Its simple and user-friendly GUI provides you with easy navigation to different features of the software. For any beginner, once you get the software installed, you will be able to perform scans and recovery in no time.
(4) Preview Functionality
The ability to see your files that are recoverable before the actual recovery process is something you cannot do without. It gives you the opportunity to selectively recover the files you want and leave out unnecessary ones. With this software, you have this feature.
(5) Scan Speed
The time taken to recover all your data is largely dependent on how much of it you want to recover. Also, Deep Scan in the Stellar Data Recovery software will not be as fast as its normal scanning mode.
(6) Pricing
Firstly, you can try this software before actually committing financially, and you do not need any form of registration. At the end of this review, find links to try it or get other packages. With a free trial, you can recover up to 1GB of data. Then, moving to a Standard Package gives you Unlimited Recovery, Deep Scans, Instant Delivery by Email, Free Technical Support 24×5, and costs $39.99 at the time of writing.
Stellar Data Recovery for Android
Stellar Data Recovery for Android is another plus to the portfolio of Stellar Recovery Software. As our smartphones are integral to our daily lives, with a lot of valuable data in them, losing this data is devastating. This can happen by malware attacks, phone damage, OS crashes, or accidental deletion. Now, Stellar Data Recovery for Android performs pretty well in this regard. It features advanced algorithms that are able to scan your device(s) internal and external storage and recover the files in them. In addition, its ability to recover your deleted phone contacts, call logs, and messages is something you will find very helpful. To get started with Stellar Data Recovery for Android, connect your Android phone to your PC, then Download Stellar Data Recovery for Android, install it, and you will be presented with the page that’s shown below.
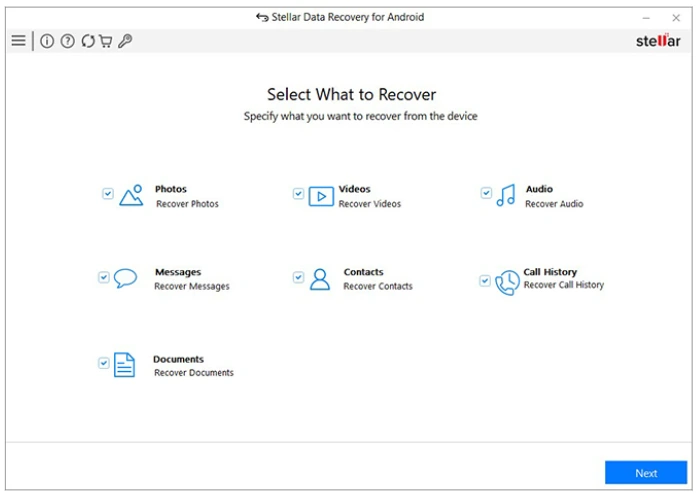
You can then go ahead to select what you would like to recover as shown in the picture above. Then, Stellar Data Recovery for Android begins to scan your phone for lost files. After the scan is complete, you can then look at the Preview of recoverable files, pick the ones you want, and click on the Recover Button to save them to your PC. This provides safety of your data as it eliminates any accidental overwriting or further data loss.
Stellar Data Recovery for iPhone, iPad, iOS, Mac Devices
Stellar Data Recovery for iOS and Mac devices just like for Android is also available. It is another valuable tool for those using these OS-based devices. Essentially, the goal is the same, helping you recover lost data. Download Stellar Data Recovery for iPhone, iPad, iOS, Mac to get started.
Final Thoughts
Evidently, Stellar Data Recovery Professional is a beacon of hope for those seeking solutions to data recovery. It is considered reliable based on its success rates, its usability, vast array of supported file types and scanning efficiency.
Get Stellar Data Recovery (Professional) on the Stellar Official Website
Get Stellar Data Recovery (Premium) on the Stellar Official Website
Get Stellar Data Recovery (Technician) on the Stellar Official Website
Get Stellar Data Recovery (Standard) on the Stellar Official Website
Get Stellar (Lab Services) for Individuals, and for Businesses on the Stellar Official Website
Get Stellar Data Recovery (Free) on the Stellar Offical Website
Download (All Stellar Software) in the Stellar Download Center
You may also want to take a look at the EaseUS Data Recovery Wizard Pro.
